


Slate Nails: Not Over Driven, Not Under Driven, Just Right

By National Slate Association.
Installing slate shingles is a craft and learning proper nailing practices can ensure a roof’s longevity. See how you can improve your slate roof offerings with improved nailing techniques.
To maintain the durability of a slate roof over time, slate shingles must be properly installed with the appropriate nailing technique. While it is easy to learn initially, proper nailing is actually quite difficult to master to ensure slate shingles hang on their nails. For this to be accomplished, each nail must be placed in just the right position, not over driven or set too tightly and not under driven or left projecting out of the slate. The National Slate Association’s (NSA) technical bulletin can provide more information on nail holes.
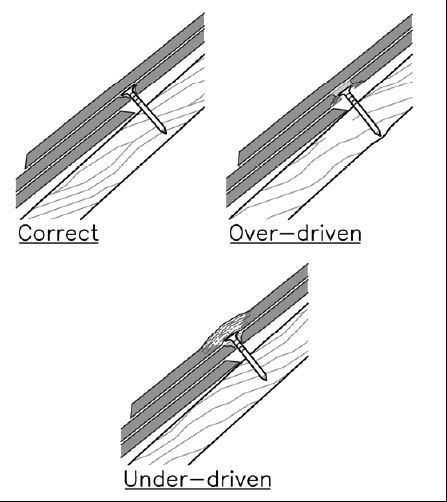
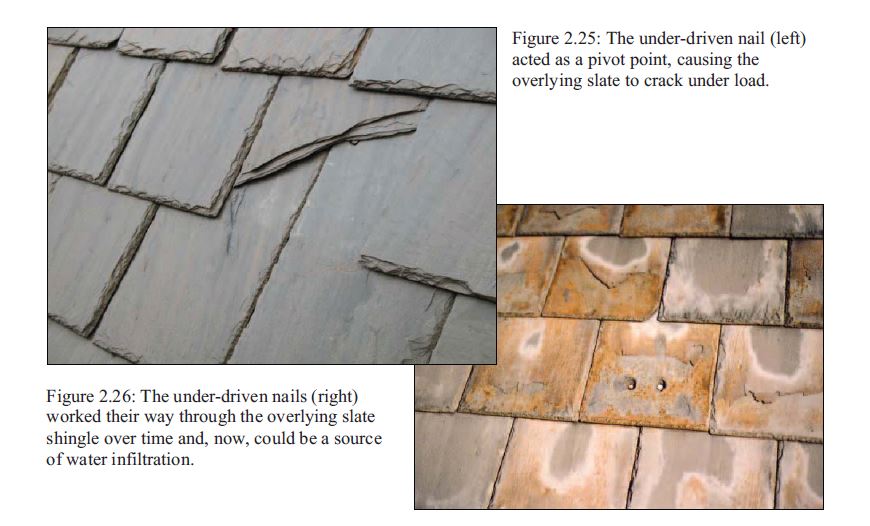
Figure 2.24 (above) illustrates both the proper and improper nailing of slates. Nails set too tightly spring the slate into a slightly concave shape, thereby placing strain on the slate and subjecting the slate to cracking under direct load or movement of the deck under thermal or wind loads. Nails set too tightly can also result in blow out on the back side of the slate, thereby reducing the holding capacity of the nail. Insufficiently driven nails can lead to cracking of overlying slates under snow, ice and foot traffic loads, as the butt end of the overlying slate is lifted by the projecting nail head(s) (see Figure 2.25). Nails not driven far enough can, over time, also be forced through the overlying slate by pressure from above (see Figure 2.26).
Each roofing slate is normally secured to the roof deck with two nails set in holes pre-punched at the quarry or punched by hand on site. Slates measuring 3/4 inch or more in thickness and 20 inches or more in length should be secured with four nails each. The two additional nails are placed approximately 2 inches above the regular nail holes.
Lastly, slate shingles located immediately adjacent to flashings should be nailed to avoid puncturing the flashing material. This can be accomplished by moving one or both of the nails up or closer to the center of the slate, securing the slate with a second nail placed above the other on one side of the slate, or securing the slate with copper wires fastened to the roof deck upslope of the top edge of the flashing.
Original article source: National Slate Association
Learn more about National Slate Association (NSA) in their Coffee Shop Directory or visit www.slateassociation.org.
Recommended For You

Building the future, one skill at a time
Read More ...
Oil canning in metal roofing: What roofers need to know
Read More ...
Day 1: Key insights and sessions at IRE 2025
Read More ...


Comments
Leave a Reply
Have an account? Login to leave a comment!
Sign In